Adding in app purchases is an extremely easy and useful tool enabling programmers to test their app without having to submit it to the app store. All the information on how to do this is on the internet but unfortunately it is often spread out, requiring numerous different posts, blogs and stack overflow questions to fully grasp. Even then every website will have a slightly different check list to make sure you have everything down and correct. I personally spent numerous hours struggling with this and am therefore writing a start to finish guide on everything required to get in app purchases up and running on your app.
This guide falls into three sections, I would go through each one and double check that each step has been completed, otherwise skip to a specific one to help with its specific area.
1. iTunes Developer Account
Create product identifiers
Create provisioning profiles
2. iTunes Connect Account
Add the app
Add a test user
Add the in app purchases
Confirm contracts
Submit Binary
3. Configure the App
Add the identifier
Add the in app purchase identifier set
Enable In app purchases
Log out
Test the app
A note on the third part of this section. The code for in app purchases is complicated and requires time and effort to put together to create a working example. This blog post is assuming your code is working correctly and that there are problems occurring with your set up else where. I personally found this component really useful when doing in app purchases: http://www.binpress.com/app/inapp-purchase-manager-for-iphone-and-ipad/1390
It is an in app purchase manager, simple add the folder to your project and you can call get products, buy product etc. Figuring it out myself would have taken much longer than an hour so for $30 this saved me a lot of time. If you are coding this yourself the configure may still hold some solutions to problems you are having.
iTunes Developer Account
Open this link to access the developer account (you will need a developer licence): https://developer.apple.com/membercenter/index.action
1. Create product identifiers
Click “Certificates, Identifiers and profiles”
Click “Identifiers”
Click “App IDs” and then the plus button in the top right
Follow the instructions to create the app identifier
Note: Here is a good walkthrough: http://blogs.telerik.com/appbuilder/posts/13-10-23/how-to-create-an-app-id-for-your-ios-app
2. Create provisioning profiles
Click “All” under “Provisioning Profile” in the left hand menu
Click the plus in the top right
Note: Here is another good walkthrough: http://blogs.telerik.com/appbuilder/posts/13-10-28/how-to-create-and-import-an-ios-provisioning-profile-using-the-icenium-extension-for-visual-studio
Note: When you download the provisioning profile, click the download and it should switch to your Xcode screen. This means the profile has been loaded into Xcode and you are good to go.
iTunes Connect
1. Add the app
Log in to iTunes connect (https://itunesconnect.apple.com/WebObjects/iTunesConnect.woa)
Click “Manage your apps”
Click “Add new app”
For this section fill in all the required fields. You will need app icons and screenshots of the required size.
2. Add a test user
In the main screen of iTunes connect click “manage users”
Then click “test user”
Click “Add new user” and fill in the required fields
Note: Each user must have a unique email address to be added as a test user. Google mail is useful as it allows multiple users on the same google account.
Note: You only need to create one tester user for all your different test apps. Once you have then you can reuse it for any subsequent test apps.
3. Add the in app purchases
Again, click “Manage your apps”
Click on your app name
Click “Manage in app purchases” in the right hand side menu
Click create new
Choose the type of in app purchase you want
Configure an in app purchase for each of the consumables in the app.
Note: Each in app purchase will require one payment. If you want each item to be sold separately then they need an in app purchase each. If you want to combine them all into one thing to sell then only add one row.
Note: This link has a walkthrough of how to add them: https://developer.apple.com/library/ios/documentation/LanguagesUtilities/Conceptual/iTunesConnectInAppPurchase_Guide/Chapters/CreatingInAppPurchaseProducts.html
4. Confirm contracts
Click “Contracts tax and banking”
Make sure all the contracts available are in effect. You will probably need to input information about your contact details, bank details and tax details.
5. Submit Binary
Click on your app
Click on “View Details”
In the top right hand corner it should say “upload binary” – click this
Click the appropriate answers to the questions then click done
Configure the App
1. Add the identifier
Open the App
Click the small folder button in almost the top left of the screen
Look for a file which ends: Info.plist
eg testApp-Info.plist
Click on this file
Change the Bundle Identifier String to the bundle identifier chosen on iTunes connect and in the provisioning profiles.
eg co.deluge.testApp
2. Add the in app purchase identifier set
Click on the app delegate and then add the following code into the didFinishLaunchingWithOptions: function.
Replace the product identifiers here with those of your own in app purchases.
[[BInAppPurchaseController sharedController] initializeWithProductIdentifiers: @[bStickerPackIdentifierAnimal, bStickerPackIdentifierSport]];
Note: This code is taken from the previously mentioned binPress component. Here we are initialising the in app purchase controller with our added products.
3. Enable in app purchases
Click on the folder button in the top left of Xcode
Then click the name of the project, it should have a blue picture just to the left of it
Now look on the inner screen, directly right of where you just clicked, it should say the name of your project with an up and down button next to it. Click the name of your project and choose the version with the ‘A’ made of wood (not the blue background blueprints)
A new main settings screen will be opened – click capabilities at the top
Open the “In app purchases” tab and make sure it is set to yes
4. Log out
Before you test the app log out of your current itunes account so you are testing the app with no itunes account. This means that when you load the iTunes store you can log in with your newly created test account to enter the sandbox mode.
5. Test the app
Testing the app, using break points and going through line by line is the most important part of the whole process. There could be hundreds of reasons why it is not working and the ones above are just the ones which are most likely assuming everything else in your app is working. I personally can not sing the praises of the in app purchase controller enough and cannot imagine implementing them into my app without it.
Otherwise I hope this has been useful and somewhere along the way you have come across the problem that was holding you back from getting in app purchases working. If you have any questions or comments then get in touch and I will try my best to explain in the cases I have not been clear.
Good luck 🙂
 I didn’t know what to expect when opening Paperama. I assumed it would be an origami app, how that would work I have no idea. I certainly didn’t think it would be one of the most challenging puzzle games I’ve played all year. Centring around an origami theme, Paperama presents you with a sheet of paper and a certain number of folds. Inside the paper is a dotted area showing you your aim for the level, simply fold the paper to fit inside the lines.
 The puzzle aspect of this game works extremely well. Only needing 80% shape accuracy to move onto the next level keeps the user from getting too stuck and also leaves a challenge for the determined gamer. It is also an extremely original idea making you think in a different way to most other puzzles games out there. Once you get into the main part of the game trial and error isn’t enough to perfect every level, its difficult to describe the feeling of being stuck and having no idea how to figure it out logically. Paperama is unique in this respect.
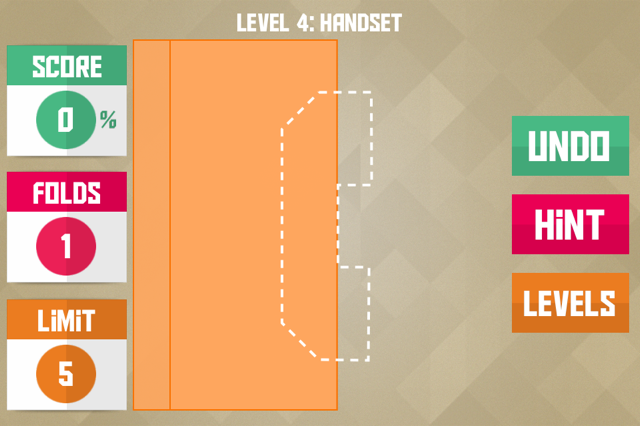 The look and feel of the game is brilliant. Bright colours, simple graphics, somehow managing to grasp that feeling I always felt when getting out the coloured paper as a kid and doing some origami. The graphics and well put together and the folding aspects of the game is super smooth and bug free. This game is a simple concept but one which would have been ruined without a well put together interface surrounding it.
 dy Crush…I mean Folt
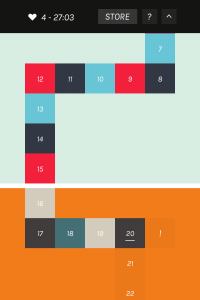 Folt is just worse than Candy Crush for a number of reasons:

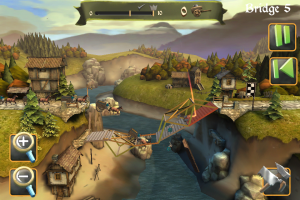 All these things though I could have forgiven and ignored if I had actually enjoyed building bridges, I didn’t though, I just didn’t get satisfaction from completing one and didn’t take interest in the building.
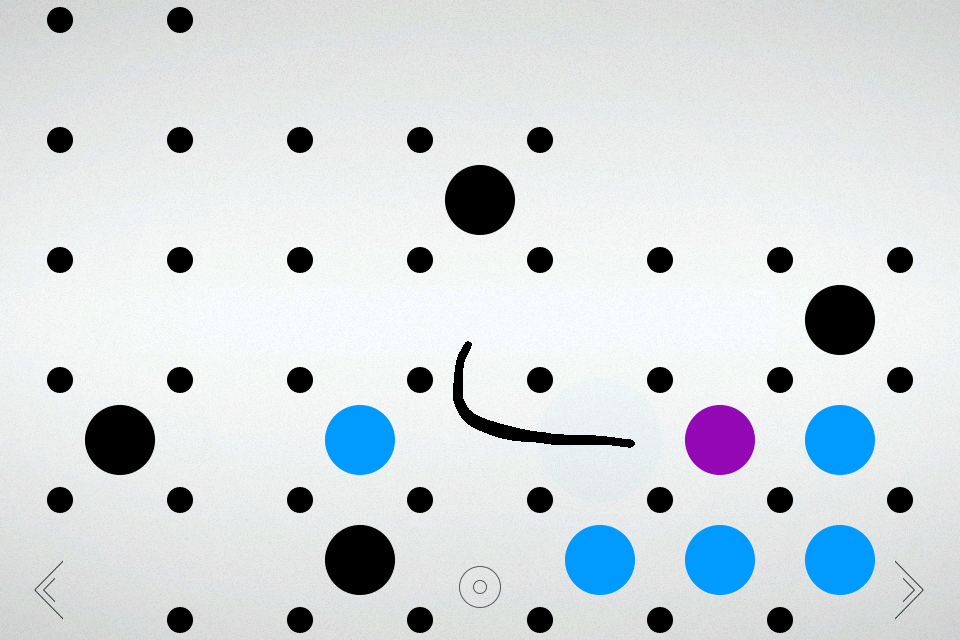
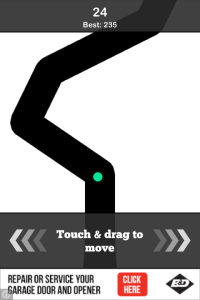 The game itself is very dull. With no real skill involved it stays comfortably in the “too easy” zone before launching you into the “far too difficult” zone at random intervals. The line is completely random and sometimes moves horizontally across meaning you have to swipe quickly to stay in the line. Unfortunately the interface is badly coded meaning sometimes when you go off the line it doesn’t realise and sometimes it thinks you are off the line when you are not. There is nothing worse than a shoddily made game and this one really takes the prize.